
Welcome to my Sourdough Club!
I love baking with sourdough and take great delight in sharing this with you.
No ads. No affiliate links. Just the joy of it! Roll up for the Magical Mystery Tour. Here we go…
Scroll below - or use these quick links:
Shopping List
Our kitchen
-
All your flours should be organic and unbleached. The highest quality source in the US is made by King Arthur Flours. Bob’s Red Mill may come in second.
There are 3 flours you’ll want to buy before beginning to work with your starter:
• Dark Rye
• All Purpose Flour
• Whole Wheat
When it’s time to bake you’ll also want to have on hand:
• Bread Flour (buy lots)
• Brown rice flour (small bag will do)
You don’t need to keep your flours in fabulous glass bottles like we’ve assembled, but it does help a lot to at least have a big container to mix up the 3-flour blend for your sourdough feeder and keep it ready at hand.
-
No, you don’t need a stand mixer like the Kitchenaid to make great sourdough, but it really helps. It lets you quickly achieve great glutton development; it shortens the time and improves the outcome - and you end up using the mixer for all sorts of other recipes too. If you don’t have one, and want one - look for a used one for a good price - they last forever. But again, if you’re note ready for plunging in at that level you can do it all by hand.
-
• Digital Scale
• Bannetons (I like small 7” round ones) - oval are fine for larger loaves too
• Plastic zip lock bag that is big enough to hold the banneton
• Dutch Oven (if you don’t have one get this)
• Lame (that’s what a razor blade holder is called); these two are highly rated: Baker of Seville • UFO (or Amazon knock offs), plus fresh blades; a cheap one may come with your bannetons.
• Bulk ferment bin - something with a lid and clear sides. Examples:
> 6 qt / 6 qt / 6 qt / 4 quart are also fine.• A dry-erase marking pen, to write on the ferment bin and wipe off with ease
• One big ole bottle with lid that you can gather and preserve sourdough ‘discard’ in and keep in the refrigerator. Ours is 2qt size and is often half to 90% full.
• Shaker that you can put rice flour in and shake it out. Alternatively a small sieve will work.
• Parchment paper or pizza peel. If your Dutch oven is deep, you’ll need parchment paper to lower your dough in place to cook. If it has a shallow lid that you can cook on, you can turn your Dutch oven upside down and use a peel to place the dough
• Heavy-duty oven mitts. Don’t rely on just hot pads for this – you really want gloves or mitts that will protect you at 500°
-
The starter and the dough love to be in a warm cozy place. The ideal temperature is 86°-90°
As you form your dough it helps to keep it at a consistent warm temperature. This includes pre-heating the water you’ll add to the dough. We happen to have a sous vide that is ideal for nailing the water temperature. If you don’t have one, get a digital thermometer to use
• If your oven includes a ‘proofing’ setting or warming oven, check that it can be set at a low enough setting. All yeasts are killed at 140°.
• If you have an oven that can have a light stay on, that will often do the trick.
• We’ve followed this video and set up our own DIY proofing box and it works superbly
• If it’s Christmas you could ask Santa for a fancy proofing box
-
Next to bread, the best thing I’ll teach you to make is crack. (That’s what you’ll come to call the sourdough crackers - they’re that good!). To make them you’ll want:
• 2 silicon mats for half sheet cookie pan
• 2 half sheet cookie pans
• Extra virgin olive oil (not fancy, just Costco brand)
• Einkorn Flour (from Italy)
Here’s the recipe and demo video
Great Tips
Remember from kindergarten how to make paste? Flour + water. Uh oh ! Try not to put any more flour down your kitchen drain than you have to. It’s better to throw it away than wash it down the sink. Anything that is just pure water and flour, or water + flour + starter, can be saved in a big jar in the refrigerator and used to great advantage (more on that later). Most people call this ‘sourdough discard’ - I call this beautiful living substance pure Prasad.
Either wash your equipment right away or soak anything you use in water right away until you can clean it. Anything you leave out to wash a bit later that dries before you get to it is 100 times harder to clean.
The secret core truth of great nutrition is to always eat a protein with a complex carb, and to always eat a complex carb with a protein. The metabolism of the body is vastly improved by maintaining this one simple rule. Since you are now going into bread making, this is especially important info to keep in mind because you’ll want to gobble down that whole loaf. Your sourdough bread will be a great source of complex carbs. Grab a piece of cheese or some nuts or other protein to balance it.
Don’t worry about the gluten-free thing (unless you’re celiac). It turns out the sourdough does magic on the flour we use, as far as our bodies are concerned. It’s like the sourdough takes in the ‘poison’ of gluten and converts it to nectar. Seriously. Even our endocrinologist who got us going gluten free a decade ago says sourdough is fine.
All About Your Sourdough Starter
Your sourdough starter is composed of live bacteria, full of consciousness and receptive to your intention and awareness. Your starter will thrive in the presence of love and attention. Here are two very powerful videos that demonstrate the power of thought and intention:

What You’ll Feed Your Starter ~
Create This Blend of Flours
You’ll use this same blend of three flours for feeding your sourdough starter forever more, regardless of how you begin or acquire your sourdough starter. So begin by mixing up a big bottle to have on hand, and label it Starter Mix.
You don’t have to weigh this out - just eyeball it.
50% All Purpose Flour
25% Dark Rye Flour
25% Whole Wheat Flour
Shake up the flours really well or blend them with a big spoon.
Ingredients:
All flours should be organic and must be unbleached.
WATER: always use the best filtered water you can. Chlorinated tap water is designed to inhibit growth of anything alive.


Beginnings
Beginning From Scratch
I began my starter from scratch, and it’s really fun to do. The bacteria that create sourdough starter are present in flour, so all it takes is flour, water and time. Doing it this way takes awhile to get going though – mine started having some action by the end of the week, but the bread I tried to make from it was horrible. It took 3 weeks for it to get over its just-started-phase and really start looking strong, so it could double or triple within a few hours.
-
Add 100 grams rye flour to 150 grams lukewarm water and stir well.
Put in warm cozy place for 24 hours.
-
Toss all but about 70 grams of yesterdays mixture and add:
• 100 g starter mix
• 115 g lukewarm waterPut back in warm cozy place for another 24 hours. (Repeat for day 3)
-
Toss all but about 70 grams of yesterdays mixture and add:
• 100 g starter mix
• 100g lukewarm waterPut back in warm cozy place for another 24 hours. (Repeat for day 5)
-
Toss all but about 50 grams of yesterdays mixture and add:
• 100 g starter mix
• 100 g lukewarm waterPut back in warm cozy place for another 24 hours.
-
Begin saving your discard in a bottle in the fridge. Put all but 25 grams of yesterdays starter in your discard bottle.
To the 25 grams of yesterday’s starter add:
• 100 g starter mix
• 100 g lukewarm waterPut back in warm cozy place for another 24 hours.
Continue feeding your starter everyday like this. Once it’s going strong you can leave it out on the countertop instead of the warm cozy place.
And once it’s really strong you can reduce your feedings to just 75 starter mix + 75 water, or even less (always keeping flour and water weights the same).
When you start baking you might be changing the amounts you add depending on the size loaves you bake, but this is a good general schedule.
Beginning From Dried Starter
Send us postage and we’ll be glad to send you some of our starter that we’ve dehydrated, or you can buy some online.
Regarding the ratios below, I recommend starting with 10 grams of dried starter because it makes it easier to work with. If you only have a little bit of dried starter, you’re fine cutting the amounts of everything used in half too and starting with 5 grams (just keep the relative ratios the same).
-
Put 10g dehydrated starter into a jar with a lid and add 20g warm water. Stir. Rest for 30 minutes.
Add 10g Starter Mix. Stir well. Put lid on jar. Put in warm cozy place for 24 hours.
-
Add 20g water and 20g Starter mix. Stir well. Put back in warm cozy place for another 24 hours.
-
Take about 80% of what’s in the jar and put it in your discard bottle in the refrigerator. To the 20% that remains (about 20 grams), add 20g water and 20g Starter mix. Stir well. Put back in warm cozy place for 12 hours.
-
Take about 80% of what’s in the jar and add it to your discard bottle in the refrigerator. To the 20% (about 20 grams) that remains, add 20g water and 20g Starter mix. Stir well. Take a rubber band and put it around the jar to mark the level of the top of the starter. Put back in warm cozy place for 12 hours.
-
Check your starter and see if it had doubled. If it has, you’re ready to start baking. If it hasn’t doubled, just keep following the schedule below until it does. It will, don’t worry. Be patient.
Begin saving your discard in a bottle in the fridge. Put all but 25 grams of yesterdays starter in your discard bottle.
To the 25 grams of yesterday’s starter add:
• 100 g starter mix
• 100 g lukewarm water
Put back in warm cozy place for another 24 hours.
Continue feeding your starter everyday like this. Once it’s going strong you can leave it out on the countertop instead of the warm cozy place.
And once it’s really strong you can reduce your feedings to just 75 starter mix + 75 water, or even less (always keeping flour and water weights the same).
When you start baking you might be changing the amounts you add depending on the size loaves you bake, but this is a good general schedule.
Beginning With A Live Starter Culture From a Pal
Lucky you! All you have to do is start regularly feeding your starter. Begin your regular 24-hour feedings that night or the next morning. Put a rubber band around your jar to mark the level where it is just after you’ve fed it and then watch how well it grows.
Just because your pal had it going doesn’t mean it is in full strong health yet - it may take a few days of regular care to build it up.
See the Q&A below for ideas about how to strengthen a weak starter.
The Regular Feeding of Your Sourdough Starter

Here’s a quick video of what my starter looks like after it has fermented and what a regular feeding looks like. Notice how much it’s risen and how spongy and light the texture of it is.
The best routine is to feed your beautiful starter once a day. You’ll set aside all but a few spoonfuls (like a minimum of about 25 grams or 1 1/2 Tablespoons) of the starter and then add water and Starter Mix each day. It’s not super critical how much you keep of the starter - what is critical is to add an EQUAL amount of water to Starter Mix.
You can feed your starter in the morning and be ready to cook with it mid-day, about 3-5 hours later. Or you can feed it at night and start mixing up a dough in the morning.
If you want to keep life simple, just give your starter 75+75 every day (i.e., to 25 grams of starter add 75 grams of starter mix and 75 grams of water) . It will love you for this.
If you want to fine tune your feeding then you can instead go in accordance with your baking schedule. If you don’t plan to bake that day or the next day, you can just do a light feeding of 25 water + 25 Mix. Then when you get ready to bake, you increase that to 75 water + 75 starter mix (or more - see ‘pre-feed’ below).
My approach: I like to keep this simple. As I show in the video above, I put my starter jar on the scale, reset the tare weight to zero, and add some warm water. Anything between 60-90 ish grams. Since it’s harder to get a liquid weight just right, I don’t sweat it. Then I exactly match that weight with Mix, since that’s easier to get exactly right.
Am I ready to bake bread? When is my Sourdough Starter ready to use?
Here’s your test: If your starter has been kept in a warm place it should double or even triple within 3-5 hours. If it’s out on the counter it may take longer, depending on your kitchen temperature - so the test for how robust your starter is can best be seen by the baseline warm cozy place analysis.
If it takes longer to double then it may still be in its early phase and need more days of feeding. I initially started my Starter from scratch and it actually took 3 weeks to get this robust. Don’t worry if yours starts out slow or goes into a slow period for awhile - just keep discarding most it of and feeding the remainder everyday and be patient as those little bacteria gradually proliferate and become stronger and stronger.
Again, you don’t need to keep it in a warm place all the time, but this is a good way to test it out to see how strong it really is when all conditions are primo.

Questions & Answers About The Starter
-
No, you don’t have to keep your starter warm all the time, but it will help speed it up and encourage it during the re-activation phase if you can.
If you go to 0:55 in this video you can see the setup I have with the igloo and a thermostat control for a seed tray warmer (+ cookie sheet).
If you have a proofing oven it may work if you can set it low enough. Or maybe you can just pre-heat it and then turn it off and use that.
You could also try the insulated cooler idea and put a bowl of boiling water in there next to it to warm up the environment, or maybe a heating pad on its lowest setting - but don’t let the starter touch the heating pad.
Also, when you get to the point your starter is happy and strong again - you can use a warm environment just when you want to encourage it - say if you’re getting ready for a baking day soon, and leave it out on the counter to slow it down at other times. For example, yesterday morning I decided to prep a bake so I fed it and put it in the igloo. I grew fast and I used it. Then I fed it again and just left it out on the counter overnight and will leave it there until tonight.
-
Just like people… when we’re malnourished or stressed, we lose our energy and vitality. Same with your starter.
If you give it a few days of pampering it should perk right up. Send it to the spa. Try this:
• Feed it twice a day
• Feed it a lot so it doesn’t run out of food to eat before you get to the next feeding. Try 100g flour + 100g water… or even more – 150/150
• Keep it in the warm cozy place all throughout this spa treatment
-
Just pop your starter into the fridge. It will last in there for a couple months if need be. When you get home, just love it up and feed it again and it should be fine.
-
You don’t want to see a pink or orange growth on the top of your starter., or fuzzy mold. That’s not good. Start over. If you see some liquid though, that’s not a problem - that’s just a sign of the starter being super-hungry. Pour it off and feed it. Remember - if you’ve kept some discard in the fridge for making crackers, you can just start feeding a bit of that to start over. Your discard is not dead, it’s just hungry.

Plan Your Baking Schedule
Creating a beautiful loaf of sourdough bread is really a 2 or 3 day project, so you’ll want to think ahead. Here are the timing options you have:
1) Feed your starter at night; the next morning mix the dough and let it bulk ferment in the early/middle part of the day; shape in the late afternoon; retard over night; bake the next day.
2) Feed your starter in the morning; it will double about mid-day; mix the dough and let it bulk ferment into the early evening; shape that evening; retard over night; bake the next day.
For reference, I find it takes a span of about 6 hours from the time I start mixing a dough until I put it in to retard. So for me, my cutoff is 5 PM - that’s how late I can start and get to bed by 11:00
3) There’s a third approach I’ll show you later for ‘emergency, I need a loaf tomorrow!’. It works too, though the bread crust is less crunchy. Stay tuned for that technique.
The Six Steps Of Making Sourdough Bread
I’ll show you two methods of working with your dough – by hand and by machine. I prefer using the stand mixer (we have a wonderful old Kitchenaid that is a beast!) and I’ll show you why in this movie. But if you don’t have a mixer or simply prefer to work it by hand, that’s great too. The only difference really is how you initially develop the gluten structure. Everything else is the same: the recipe, the mixing, the bulk ferment, the retard and the bake.
Step One - If your starter is ready… Add everything into the mixing bowl and mix
Readying Your Starter: A healthy starter will rise to what is known as its peak in 3-6 hours; then it will stay at that level for several hours - and then it will gradually fall back to baseline again. In this cycle, the ideal time to use it on a baking day is when it’s near its peak, or slightly before or slightly thereafter.
Using it before it has peaked means it will give you a lot of rise, but not have its full sour flavor. Using it when it has peaked and started to deflate back down again means it will be very sour but not have much rise left. Think Goldilocks: the best is right in the middle - still near the peak or a little thereafter.
If your starter is a little flat, wait and create a levain and let that rise up to peak - then use that to bake.
Measuring out and mixing the ingredients – This step is also really easy to do with your hand, with a spoon or with a dough whisk.
Step Two - Kneading The Dough
This is the only step that is different depending on whether you want to use a stand mixer or do it by hand. Pick how you want to proceed:
Step Two - Kneading the Dough (Stand Mixer Option)
After you mix up the dough, you’ll let the KitchenAid knead it for you to develop the gluten formation to perfection. There are 2 ways to do this - pick whichever method you prefer, depending on your time demands; the outcome will be the same:
OPTION 1)
SHORTER OVERALL TIME /
MORE ACTIVE INVOLVEMENT TIME
Begin kneading directly after you finish mixing the dough. If you do this, you’ll need to knead for about 15 minutes. Since the Kitchenaid really prefers not working that hard for more than 10 minutes at a time, you’ll have to remember to give it a rest and let it cool down mid-way through. So figure this to be about a 20 minute option (7 on + 6 off + 7 on).
OPTION 2)
LONGER OVERALL TIME /
LESS ACTIVE INVOLVEMENT TIME
This option involves autolysing the dough before you knead it. That simply means resting it for 15-60 minutes before you begin the kneading phase. During the autolyse, the dough gets sticky and the gluten begins forming on its own within the dough - simply because the flour is now wet. If you do this step, then you will probably only knead in the mixer for about 9-10 minutes.
You will knead the dough until you see good “window pane” development, meaning the gluten can be pulled and not tear. BUT be careful not to over-knead your dough – you will break down the gluten and this will result in a flat bread that has trouble rising.
Whichever method you adopt, do not go by time - go by the windowpane test.
Check frequently to make sure you don’t go beyond this threshold.
Use the bread hook and knead until you get a good window pane
Step Two - Kneading the Dough (By Hand Option)
After you mix up the dough, you’ll alternate resting your dough for 30 minutes and then doing a Stretch-And-Fold to develop the gluten formation to perfection. Begin with the rest period right after you finish mixing ingredients.
After the 3rd Stretch-And-Fold check to see if you have good “window pane” development yet, meaning the gluten can be pulled and not tear and is almost translucent. If not - rest it for another 30 minutes, Stretch-And-Fold and check again. It usually takes 3 or 4 such rounds to achieve the window pane, so this entire ‘kneading’ phase will span 105-140 minutes. Here’s what the Stretch-And-Fold process looks like:
Showing 4 rounds of Stretch-And-Fold
Step Three - Rest the Dough to Let It Rise
This step is also known as Bulk Fermentation.
After the dough passes the ‘window pane’ test of being able to stretch it thin without it breaking too readily – it needs a good long nap ~ time to grow and develop. The amount of growth you’re looking for is between 25-50%. (I’m currently using a target of 33% and getting wonderful results).Put the dough in a container that you can see through and use a dry-erase marker to estimate where your target growth will be. Set your timer for about 3 hours and check the dough. If it hasn’t reached target yet, start checking more and more regularly. It can really start growing fast. Go by growth, not time.
If your proofing area is cooler than the 86°F shown, it may take 5-8 hours. (You can use this to your advantage if you need it to proof slowly while you go to work, etc. - put it in a cooler area to slow it down). It’s better to ferment slowly than to rush the fermentation stage by heating up your proofing area too much. A slow ferment helps develop wonderful sour flavor and good gluten development throughout the dough.
Here’s an interesting video by a guy I follow who tests different fermentation values from 10-75%. It’s during the Bulk Fermentation period where you can really dial in how open or closed you prefer your bread texture to be:

Step Four - Shaping (“Enrapture”)
When the bulk fermentation goal has been reached, you’ll turn the dough out onto your counter and do two “shapings”. Shaping is my favorite part.
“Shaping” is what all the other sourdough bakers online call this process, but I discovered that was misleading. This process is really not about the shape you want. It is about the exquisite technique of creating a strong outer layer of gluten that wraps around your dough (hence ‘enrapture’). This is achieved by how you work the dough on the counter.
This is a critical stage of sourdough bread making, and doing it well results in the bread really rising high when it cooks the next day. If you skip this step and just plop it in your banneton, your bread will be relatively flat. If you do one shaping, it will be medium high and medium springy. If you do TWO shapings, letting the dough rest about 15-30 minutes in between, you give it the best chance to rise high and have great oven spring when it cooks.
This demonstrates pre-shaping and final shaping
Step Five - Refrigerate Overnight
(This is also known as The Retard)
How Long Do You Ideally Leave It In The Fridge?
The ideal retard is just overnight, though your bread will be fine if you bake it within about 48 hours of putting it into the refrigerator. I’ve baked off loaves that I left in longer than that and they still taste fine, but they don’t rise nearly as well. I even saw a video of a guy who had forgotten about his retarding bread for 3 weeks; he baked it and it was pretty good, though really really sour and flat.
You can use the retard window to your advantage to have many consecutive days of fresh bread; making up 2 loaves at a time gives you one for tomorrow and one for the next day.
Does Refrigeration Temperature Matter?
You don’t want your dough to freeze, but the colder the better. The colder the dough is, the easier it is to score just before you bake it.
Step Six - Baking
Get Ready To Bake:
See temperature section below. Put your oven shelf up to the highest position in your oven that will accommodate your Dutch Oven. Preheat your oven for 30-60 minutes with the Dutch oven in it. Then before you pull your banneton out of the fridge to bake your bread, lay out your tools:
Oven mitts
Rice flour
Pizza peel or parchment paper
Lame (razor blade)
Timer
If you are using a Dutch Oven with a shallow lid, that lid becomes the base in which you cook the bread, with the deep part placed on top as a lid. With this shallow type pan it’s great to use a pizza peel to put your dough on and slide it off into the hot pan; even an upside down cookie tray could work.
If you are using a traditional Dutch Oven that is deep you’ll be placing your dough inside the deep part. To make this easy to do, cut out some parchment paper to make a sling that will be easy to lower your down into the oven with. Sprinkle it with rice flour and put your dough onto it - then use the edges of the paper to lower the bread in. Let the bread bake directly on the parchment paper.
You want to bake your dough as soon as you can after you take it out of the fridge, so make sure you’re setup and the oven is super hot before you take it out.
Sprinkle rice flour on the top of the dough in the banneton and spread it evenly around the top.
Turn the dough out onto your paper or onto the peel.
Score the dough - about 1/2” deep
Put it into your Dutch oven and put the top on the Dutch oven so it will steam.
Set your timer.
SCORING the dough is important because the steam has to escape for the dough to rise properly. A dough that is not scored will be more dense and flat. You can just make one simple line across the top or get as decorative as you like in this phase, but you don't want to take too long doing so, as scoring gets more difficult as the dough warms up. Here’s some fun inspiration: FoodGeek • BreadJourney • CristinaRoxas •
BAKING TEMPERATURE FOR SOURDOUGH BREAD
This is one part of the process that is going to require your own experimentation, because the way your oven performs and how long and how evenly it holds heat will make a big difference in the height and openness (i.e. the “oven spring”) of your bread.
Start by setting your oven to 500°, or at least to its highest temperature if it can’t go that high. Put both the base and the lid of your Dutch oven in and let the oven and the Dutch oven preheat for at least 45 minutes to an hour.
You’ll put your dough in and quickly close up the Dutch oven. This is when the dough really rises and cooks, because it steams inside the Dutch oven during this phase. Then you’ll take the lid off the Dutch oven and let it brown and let the crust get crispy. During this phase don’t go strictly by time but by how brown the crust is becoming - check periodically.
~ ~ ~
I have surveyed many, many different bakers and here is the range on the times and temperatures I’ve seen used:
Initial temperature: 500 / initial time: 20 minutes / second temperature: 450 / second time: 20 minutes
Initial temperature: 450 / initial time: 30 minutes / second temperature: 450 / second time: 20 minutes
Initial temperature: 500 / initial time: 17 minutes / second temperature: 400 / second time: 23 minutes
Initial temperature: 465 / initial time: 35 minutes / second temperature: 410 / second time: 10 minutes
Initial temperature: 430 / initial time: 20 minutes / second temperature: 430 / second time: 30 minutes
Initial temperature: 500 / turn oven off for 20 minutes / second temperature: 450 / second time: 20 minutes
How are you to determine what’s best for you? Start at the top of this list and see what you get. If the bottom crust seems a bit too hard or tastes a bit burnt then lower the temperature a bit for your next batch. Keep a piece of paper next to your oven and keep track of what you’ve done and what the results are. Or try the test I show in this video (coming):
More Cooking Tips:
It’s important to not underbake your bread. Underbaked bread will not rise properly and will be more dense than a fully cooked loaf.
During the browning stage, after you remove the lid of the Dutch Oven, you may want to rotate your pan so the bread browns more evenly; depends on your oven. For my oven, I have to divide my browning time in half and turn it at the midpoint.
If your oven isn’t as robust as you think it should be, you may find your bakes improve dramatically by keeping a pizza stone on the lower shelf. This absorbs the heat and then stabilized the heat dispersal. (And wait until you make sourdough pizza dough!)
Don’t skimp on the preheat time for your oven and don’t forget to preheat the Dutch Oven too.
COOKING TWO or MORE LOAVES
Make sure to leave the top and bottom of the Dutch oven inside the oven when you take your first loaf out - or put them back in right away.
Leave about 15-20 minutes for the oven to completely regain all its heat before you put the second loaf in to cook. It loses a lot of heat when you pull your first loaf out.
The Hard Part…
After you take the bread out of the oven, you’ll be tempted to tear right into it. Right? Hot sourdough bread … yummm!!!!
But apparently sourdough continues cooking inside for quite some time after it comes out of the oven. Everyone recommends waiting at least an hour – and some say 2 or 3 hours is even better. By waiting and letting the bread cool down, the steam is locked into the crumb; this helps it stay fresher longer without drying out. Of course… if you plan on eating the whole thing that day - who cares?
The best way to store your bread? Not in the refrigerator and not in a plastic bag! Just wrap it in a towel or cloth, or get a little drawstring bread bag.

About Bannetons for Proofing Sourdough
Bannetons are made of bamboo or wicker and allow the dough to breathe a bit as it continues fermenting in the refrigerator overnight. This long slow ferment is known as the Retard, because you’ve retarded or slowed down the fermentation process - but it’s still going on. During the overnight rest the flavor will get more acidic and the real sourdough flavor develops.
Most bannetons come with a little cotton or linen inner liner. You can use that if your dough seems super moist or if you like the idea of periodically washing your liner. Simply pull it over the banneton and put the rice flour directly onto the cloth - then the dough will sit inside the banneton on the cloth liner.
I always just put the dough right into the banneton directly without the cloth, simply dusting the bamboo with the rice flour directly. I like the little lines the bamboo gives the final bread and the simplicity of this approach. If you want to go this route, then the first time you use a new banneton you want to prep it by washing it with cold water (no soap) and giving it an abundant sprinkle of rice flour while it’s wet. When it dries you can shake out the excess flour. After that just scrape out any excess if it builds up too much, but don’t wash it with soap.
When you put your dough in your banneton you then put the banneton in a big zip lock bag. You can reuse the same bag over and over; just turn it inside out to dry after you take your bread out.
The Recipes: Sizes and Proportions
The following recipes are all the same - just proportioned up or down to give you different size loaves. They all have 20% rye, which we find is just the right balance. (read more about rye’s benefits). They are “75% hydration”. All weights shown below are pre-cook.
You can pre-plan what size loaves you want, or let the quantity of starter you have on hand determine what size dough you’ll make.
A loaf weighing 600g (before cooking) is a great small loaf for 2 people to enjoy for 2 days (or 3 if you stretch it). A ‘large’ size loaf that’s about 7” diameter weighs about 700-800g.
~ ~ ~
What if I’m just not into the rye thing?
Or I want more of that rye flavor?
No worries. I suggest you start with my recipe here and try it, at least until you’ve mastered the technique. Then feel free to start experimenting. Start by keeping the overall total flour proportion the same. If you go all bread flour, you might find you can decrease the water a bit. If you add in whole wheat or other whole grain flours you may need to compensate by adding more water.
All bread flour will give you maximum loft and lightness; more whole grains will make the bread more dense.
How much starter should I create?
If you want to get more precise… At the side of each set of ratios below you’ll find a value for “pre-feed”. Let’s say you always want to have 25g of starter (about 2 Tablespoons). This left over starter is what you’ll use to feed and rebuild your starter for next time. (I’ve also assumed you’ll use a 1:3:3 proportion of starter to water to flour). The pre-feed value you see means how much you’ll have to feed your starter the night before you make dough to have just the right amount for the dough and some left over to rebuild from. If anything, err on the side of creating a bit more starter than you need - this gives you a starting point though.
So for example, in the first set of ratios below for a 500g loaf, you need 52g starter. The night before add 33g Starter Mix and 33g water to your reserved starter. This will give you at least 77g starter - you can use 52 and have 25 left over to rebuild from.
Don’t worry about making more starter than you need for each bake though - you’ll want to save all the ‘excess’ (aka discard) and make my amazing Crack-Crackers.
600 g
pre-feed: 45/45
| STARTER | 62g |
| WATER | 224g |
| SALT | 6g |
| RYE Flour | 62g |
| BREAD Flour | 247g |
| TOTAL WEIGHT | 600 |
A 600 gram dough is too small to work with the dough blade of the KitchenAid. Just use the paddle blade throughout the knead cycle.
700 g
pre-feed: 50/50
| STARTER | 72g |
| WATER | 261g |
| SALT | 7g |
| RYE Flour | 72g |
| BREAD Flour | 288g |
| TOTAL WEIGHT | 700 |
800 g
pre-feed: 55/55
| STARTER | 82g |
| WATER | 298g |
| SALT | 8g |
| RYE Flour | 82g |
| BREAD Flour | 329g |
| TOTAL WEIGHT | 800 |
900 g
pre-feed: 60/60
| STARTER | 93g |
| WATER | 335g |
| SALT | 9g |
| RYE Flour | 93g |
| BREAD Flour | 370g |
| TOTAL WEIGHT | 900 |
1000 g
pre-feed: 65/65
| STARTER | 103g |
| WATER | 373g |
| SALT | 10g |
| RYE Flour | 103g |
| BREAD Flour | 411g |
| TOTAL WEIGHT | 1000 |
1100 g
pre-feed: 70/70
| STARTER | 113g |
| WATER | 410g |
| SALT | 11g |
| RYE Flour | 113g |
| BREAD Flour | 452g |
| TOTAL WEIGHT | 1100 |
1200 g
pre-feed: 75/75
| STARTER | 124g |
| WATER | 447g |
| SALT | 12g |
| RYE Flour | 126g |
| BREAD Flour | 493g |
| TOTAL WEIGHT | 1200 |
1300 g
pre-feed: 80/80
| STARTER | 134g |
| WATER | 485g |
| SALT | 13g |
| RYE Flour | 134g |
| BREAD Flour | 535g |
| TOTAL WEIGHT | 1300 |
1400 g
pre-feed: 85/85
| STARTER | 144g |
| WATER | 522g |
| SALT | 14g |
| RYE Flour | 144g |
| BREAD Flour | 576g |
| TOTAL WEIGHT | 1400 |
1500 g
pre-feed: 90/90
| STARTER | 154g |
| WATER | 559g |
| SALT | 15g |
| RYE Flour | 154g |
| BREAD Flour | 617g |
| TOTAL WEIGHT | 1500 |
1600 g
pre-feed: 95/95
| STARTER | 165g |
| WATER | 597g |
| SALT | 16g |
| RYE Flour | 165g |
| BREAD Flour | 658g |
| TOTAL WEIGHT | 1600 |
1700 g
pre-feed: 100/100
| STARTER | 175g |
| WATER | 634g |
| SALT | 17g |
| RYE Flour | 174g |
| BREAD Flour | 700g |
| TOTAL WEIGHT | 1700 |
1800 g
pre-feed: 105/105
| STARTER | 185g |
| WATER | 671g |
| SALT | 18g |
| RYE Flour | 186g |
| BREAD Flour | 740g |
| TOTAL WEIGHT | 1800 |
1800 grams is about the largest size that my 5 quart KitchenAid bowl is happy with.
1900 g
pre-feed: 110/110
| STARTER | 195g |
| WATER | 708g |
| SALT | 19g |
| RYE Flour | 195g |
| BREAD Flour | 782g |
| TOTAL WEIGHT | 1900 |
Treat Yourself To A Good Knife

If you’ve been using your grandmother’s old bread knife - it’s time to upgrade. What a difference a good knife makes!
A friend just gave me a Suncraft Seseragi Bread Knife from Japan and it is truly amazing. I thought I had bought a well-rated bread knife last month - and it is good - but this Suncraft is crazy! (It even comes left handed or right handed) (here’s the best link I could find) - if it’s not time to splurge, you can search Amazon and find other good second choices.
EXPERIMENTS !
I love things like taste tests and experiments. I like to see for myself what really works and distinguish it from a preconception being passed along. In this section I’ll share with you some of my experiments so you can see the methodology.
Upcoming tests:
Does banneton size matter
Comparing shaping one, two or three times with same proof time and with graduated proof times
Comparing oven spring on same dough baked on day 1, 2, 3 and 4 of retard
Segmenting the process at different points to do some the night before and some the next day
What contributes most to sourness? stage of starter? speed of bulk fermentation? time in retard?
In this video I compare making sourdough bread completely by hand versus completely in a stand mixer and show you the results of each technique:

Par-Bake for Sourness
Check out this video that Sune, the FoodGeek, recently posted.
The deal is that you parbake your loaves for a short time with the lid on as usual, steaming them and letting them rise as usual, then you take the loaf out and cook it off the next day. Or the next, or… The result he found is that the bread gets more and more of that sour sourdough taste. We happen to love that - if you don’t, skip this idea then.
But there are more benefits of this that he doesn’t talk about, and include:
Being able to bake off 2,3 or 4 loaves at once and then hold them aside to cook off just when you want them. So then you could just heat your oven up to 450-500° before dinner for a few minutes - pop a parbaked loaf in to brown for 15 minutes - and voila! Hot sourdough loaf ready to eat on the spot. We’ve already seen how it really gives a lot more freedom to timing the whole thing.
Also - want to give a friend a loaf? Parbake it and then tell them to cook it off when they’re ready for their own hot loaf. Since the second cook doesn’t really need the fancy dutch oven pan, anyone can do it. We even cook it just on the oven rack itself.
I’ve taken the second bake out 3-4 days and it was still delicious. Sune says it’s too sour for him, but we didn’t think ours was at all. There’s probably an outer limit to how long a bread will last before going over to the dark side, but it will be fun to see. I’m even just leaving them up on the counter until ready to cook, with a little towel over them.
So, technicalities: how long do you parbake? You are aiming for an internal temperature of 200° and not too much more. I’ve found that the time on when I hit this varies by size of loaf, so my smaller loaves of around 400-500 gram hit that in about 17 minutes, whereas a 800 gram loaf might need 23 minutes. We just started experimenting with this, so I’ll sure the exact refinement will come with time and more note taking.
Some of my other Sourdough recipes
Crack Crackers
Made from your sourdough discard
To make 2 half-size cookie sheets:
STARTER DISCARD: 204g
OLIVE OIL: 51g
EINKORN ALL-PURPOSE FLOUR: 102g
SEA SALT: 4g
The first time you make these, use a preheat temperature of 400° F, then turn your oven off after just a minute or two. The second round of the cook really builds crispness. If you need a third round, then you know you can increase your temperature a bit more the next time you bake.
Eventually you can get your exact oven settings perfectly dialed in so you can put them in and come back an hour later to perfection.
UPDATE:
ePod has convinced me that a little less thin is better for these crackers. If you agree with her, here are the proportions for 10% more robust (for 2 cookie sheets) - target 196 grams per sheet:
To make 2 half-size cookie sheets:
STARTER DISCARD: 224 g
OLIVE OIL: 56 g
EINKORN ALL-PURPOSE FLOUR: 112 g
SEA SALT: 4 g

If you don’t have a silicon mat, remember that spreading the dough out to 150 sq. inches (10” x 15”) is a critical part of automatically getting the thickness just right. So strive for that dimension with whatever you use, or change your proportions a bit to compensate.
I find that trying to use a rolling pin with these just sticks like crazy, but sometimes I put a bit of oil on my hands before I start patting it out. If you really want to try the rolling pin, give it a good oil before you start. If they’re too sticky then chilling the batter first helps reduce the stickiness. 5 minutes in the freezer or 30 in the fridge will do it.
Other Flours I’ve tested:
I tried almond meal/flour - yuck
whole wheat - too dense
Einkorn whole wheat - acceptable, almost (not quite) as good as Einkorn all purpose
next test: half and half - all purpose Einkorn + whole wheat Einkorn

Pizza Crust
Dough for 2 crusts
325 g bread flour
200 g water
8 g salt
65 g sourdough starter
9 g extra-virgin olive oil
Instructions
Mix dough and bulk ferment
Mix everything until all the flour is hydrated. Leave to rest for 30 minutes covered.
Perform 3 or 4 sets of stretch and folds spaced out by 30 minutes – or use KitchenAid – until dough passes windowpane test.
Put the dough in a bulking container and let it rise to double size.
Divide, shape and final rise
Divide the dough in half (300 g dough makes about a 10” pizza).
Oil a roasting pan or cookie sheet with olive oil.
Shape each dough piece into a taut ball as you would for sourdough bread and place on pan.
Cover the pan with plastic cling wrap and let the dough final rise for about 1 hour at room temperature. You can bake with it then or retard in the fridge up to 5 days.
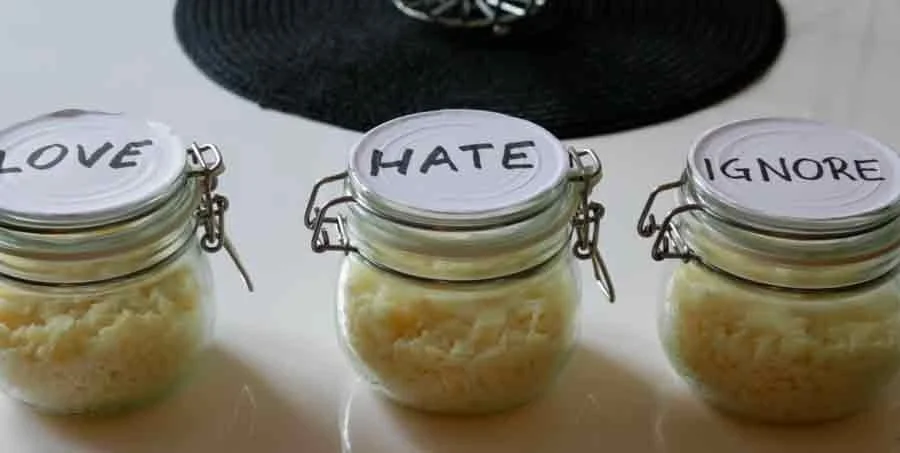
Farmers Cheese
Half a lemon per quart of milk

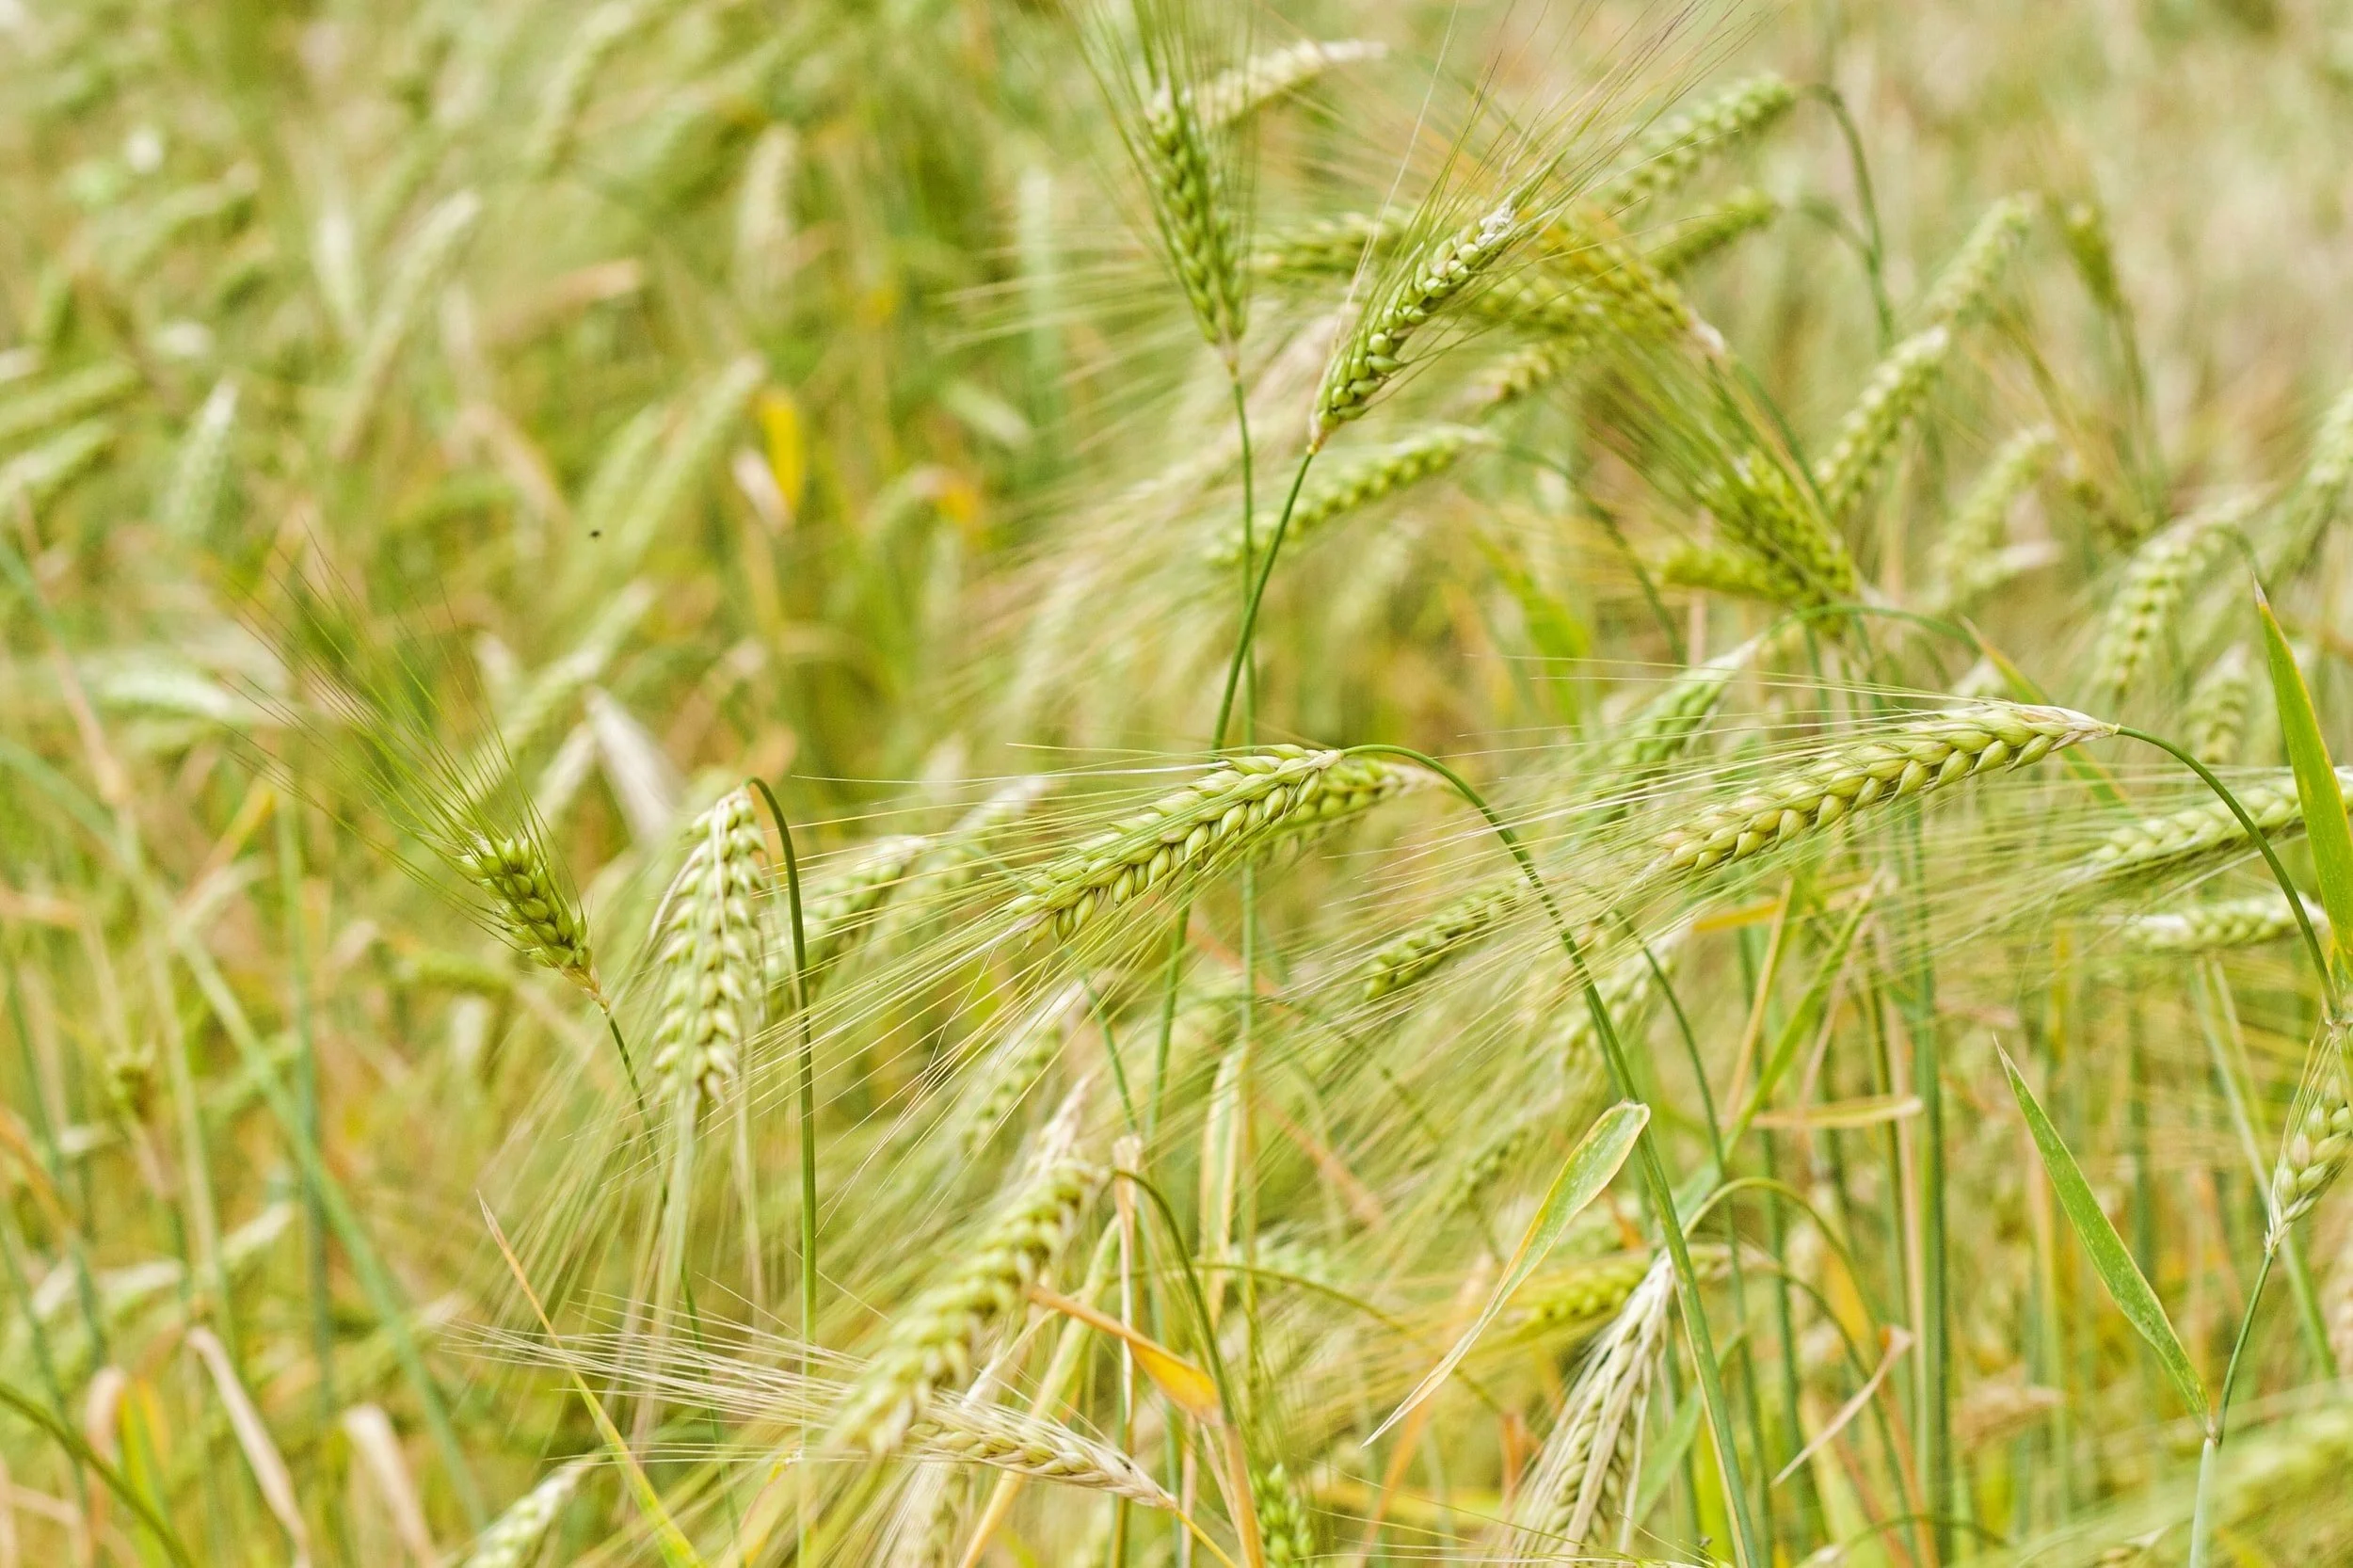
In Praise of Rye
There’s something magic about the combination of sourdough + rye. The rye gives the sourdough more depth of character, while the sourdough mellows out the intensity of the rye. They seem to work together in a way that makes them ultra-satisfying. We’ve tried higher and lower proportions of rye to bread flour, and found 20% to be just right for us. Experiment as see what you like best.
Health Benefits
1. Help Lower Weight and Cholesterol
2. Glucose Control
3. Appetite Control
4. Reduces Inflammation
5. Gene Regulation
6. Prevents Gallstones
7. Fights Cancer


In Praise of Einkorn
I haven’t found Einkorn to be particularly great in my bread recipes, though it could be worth playing with a bit more – but it is amazing for the crackers. Here’s some interesting info about this ancient grain:
Einkorn is the only wheat never hybridized and has only two sets of chromosomes.
It’s grown organically and tested for glyphosate.
Its weak gluten makes it easier to digest.
It lacks the gluten proteins that trigger symptoms of gluten sensitivity.
It is higher in protein and lower in carbohydrates than modern wheat.
It is richer in carotenoids, B vitamins, and essential and trace minerals than modern wheat.
It tastes great with a nutty flavor, silky texture, and a buttery yellow color.
Bakes flavorful cakes, muffins, cookies, and scones - and crackers!!!!
It is not bleached, bromated, or enriched.
Supporting einkorn preserves precious biodiversity.